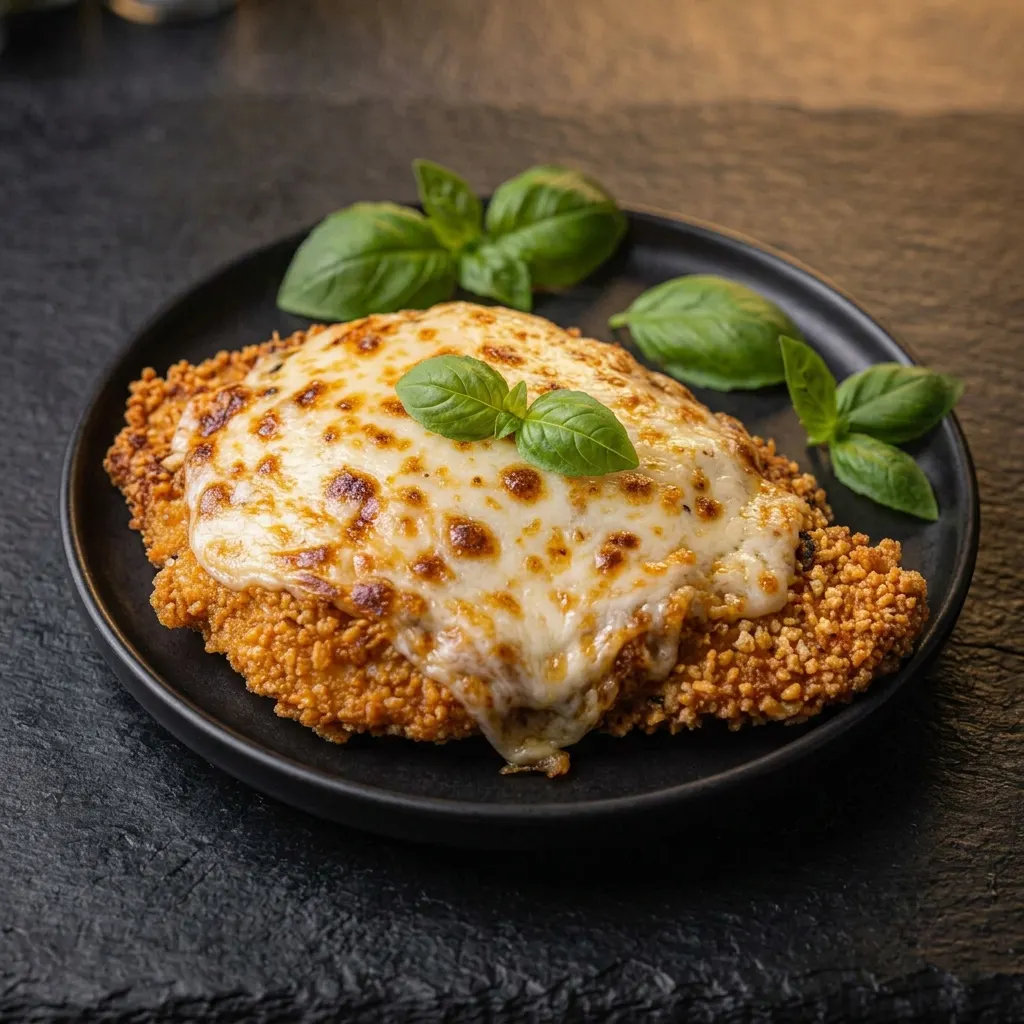
Best Chicken Parmesan – Crispy, Golden & Better Than Any Restaurant
The restaurant versions I had eaten as a kid were almost always slightly soggy under the sauce. The coating would be crisp when it came out of the fryer but by the time it reached the table with marinara and melted mozzarella on top, the bottom half of the breading had absorbed the sauce and turned soft. I assumed that was just what chicken parmesan was.
It is not. Once I understood why the coating goes soggy and what stops it from happening, chicken parmesan became the crispiest thing I make and it stays crispy through the sauce, through the cheese, through the baking, and even into leftovers the next day.
Chicken parmesan is the dish I grew up ordering at every Italian American restaurant we went to. It was always good enough crispy coating, melted cheese, sauce that came out of a jar and somehow still worked. But it was never as good as it could have been, and I did not understand why until I started making it at home.
Why This Recipe Works Every Time
Most chicken parmesan recipes tell you to bread the chicken, fry it, add sauce, add cheese, bake it. What they skip is the explanation of what each step actually does and why the order matters.
The three-stage breading process flour, egg, breadcrumbs is not arbitrary. Flour creates a dry, slightly rough surface that gives the egg something to grip. Without flour, egg slides off smooth chicken skin and the breadcrumbs fall away from the egg in patches. Egg is the binding agent that bridges the flour and the breadcrumbs – it creates a wet surface that breadcrumbs press into and adhere to as they fry. Breadcrumbs are the structural layer that crisps and browns. Each layer serves a specific function and skipping any one of them shows up immediately in the finished dish.
Panko breadcrumbs over Italian breadcrumbs for one specific reason: texture. Italian breadcrumbs are fine and compact they fry into a dense, slightly heavy coating. Panko is coarser with a flakier structure that creates more air pockets when it fries. Those air pockets expand with steam and produce a lighter, crispier coating. Mix a small amount of freshly grated Parmesan into the panko and you get both flavor and extra crispiness from the cheese browning in the hot oil.
The coating goes soggy for one specific reason: steam trapped between the coating and the sauce. When marinara goes directly onto hot fried chicken, the heat turns the moisture in the sauce into steam. That steam has nowhere to go but into the coating. Within two or three minutes, the coating directly under the sauce has softened.
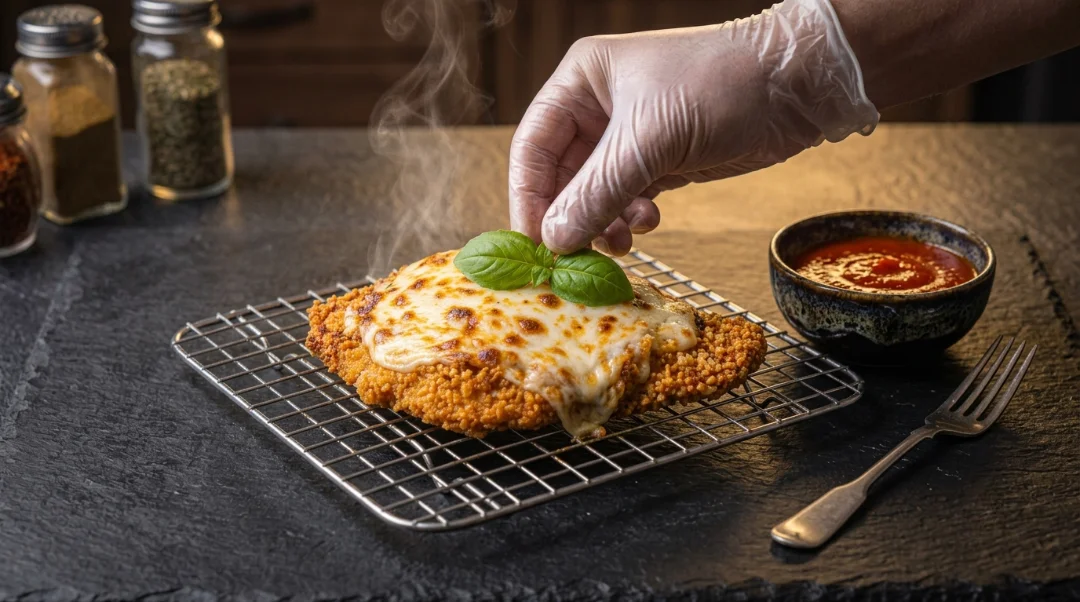
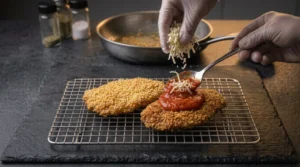
The fix is simple and almost no recipe explains it clearly: let the fried chicken cool on a wire rack for two minutes before adding sauce. The surface temperature drops just enough that the steam generation slows down significantly. Then add the sauce in a thin layer over only the center of the chicken – not the edges. Leaving the edges exposed means the coating there stays dry and crispy even after baking. The contrast of crispy edges and sauced center is what great chicken parmesan actually feels like to eat.
Low-moisture mozzarella melts better than fresh mozzarella for this recipe. Fresh mozzarella contains significantly more water, which releases as steam during baking and you guessed it soaks into the coating. Low moisture whole milk mozzarella melts into a smooth, stretchy layer that stays on top of the chicken instead of releasing moisture into it.
Things I Learned Making Chicken Parmesan at Home
Oil temperature is more important than most recipes emphasize. The oil for frying chicken parmesan should be at 350F before the chicken goes in. Below that temperature and the coating absorbs oil before it has a chance to crisp you end up with greasy, heavy breading. Above 375F and the coating browns before the chicken has fully cooked through. A digital thermometer is the only way to know for certain where your oil is.
The cutlets need to be thin and even. Thick chicken breast takes too long to cook through at the temperature needed to crisp the coating without burning it. Slice each breast in half horizontally to create two cutlets, then pound them to about a third of an inch thick. Thin cutlets cook through in two to three minutes per side fast enough that the coating does not over-brown before the center is done.
Season every layer. The flour gets salt and pepper. The egg gets a pinch of salt. The breadcrumb mixture gets Parmesan, garlic powder, and Italian seasoning. And the marinara is seasoned before it goes on the chicken. Chicken parmesan that tastes flat almost always comes from seasoning only the top layer and leaving everything underneath bland.
Let the breaded cutlets rest for five minutes before frying. This gives the breadcrumbs time to hydrate slightly from the egg layer and adhere more firmly. Cutlets that go straight from breading into the oil sometimes have patches where breadcrumbs fall off in the first thirty seconds of frying.
What Can Go Wrong With Chicken Parmesan
Soggy coating: sauce went on too soon after frying, sauce was too thick and wet, or fresh mozzarella was used instead of low moisture. Let the chicken cool two minutes on a rack, use sauce thinly, and switch to low-moisture mozzarella.
Coating falls off during frying: the flour step was skipped, the egg was too thin, or the cutlets went into oil that was not hot enough. Do all three steps of the breading in order and bring oil to 350F before the chicken goes in.
Greasy coating: oil was below 350F. The coating absorbed oil instead of crisping. Use a thermometer.
Burnt outside, raw inside: cutlets were too thick. Always slice and pound to one-third inch before breading.
Cheese does not melt properly: oven temperature was too low or baking time was too short. After frying, the chicken just needs the cheese to melt two to three minutes at 425F under the broiler melts the cheese faster and more evenly than a longer bake at lower heat.
Four Chicken Parmesan Variations
Classic chicken parmesan: The base recipe as written. Panko Parmesan crust, marinara, low moisture mozzarella, finished under the broiler. This is the version I make most often and the one that pleases everyone.
Chicken parmesan sandwich: Use the fried cutlet in a toasted hoagie roll with marinara, mozzarella melted under the broiler, and fresh basil. One of the best sandwiches you can make at home and comes together faster than the plated version.
Baked chicken parmesan: Skip the frying step. Coat the cutlets in the same breading, spray generously with avocado oil cooking spray, and bake at 425F for 18 to 20 minutes flipping once. Less crispy than fried but significantly easier. Add sauce and cheese in the last five minutes.
Air fryer chicken parmesan: 400F for 10 to 12 minutes, flipping at six minutes. Spray breaded cutlets generously with avocado oil cooking spray before air frying. The air fryer produces a surprisingly crispy coating without any oil in the pan. Add sauce and cheese and air fry for two more minutes to melt.
What I Usually Serve This With
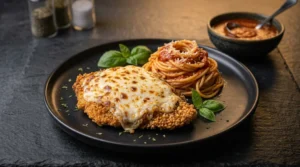
Chicken parmesan is served over pasta at most Italian-American restaurants and that combination works for good reason the marinara sauce that drips from the chicken during baking flavors the pasta underneath without any extra effort.
Spaghetti or linguine tossed with a tablespoon of olive oil and a ladle of the same marinara used on the chicken is the most natural pairing. The flavors echo each other and the pasta soaks up any sauce that comes off the chicken.
Garlic bread alongside keeps the Italian-American feel of the meal. Toast sliced ciabatta with butter and garlic under the broiler while the chicken bakes.
For a lighter option, a simple arugula salad with lemon and Parmesan underneath the chicken lets the crispy coating stay the focus without a heavy pasta alongside.
Pair with Lemon Herb Chicken if you are cooking an Italian themed spread with two proteins, or use Best Chicken Marinade the night before for deeper flavor in the cutlets before breading.
Storing Crispy Chicken Parmesan
Chicken parmesan keeps in the fridge for up to three days in an airtight container. The coating softens significantly in the fridge this is unavoidable. Reheating the right way brings back most of the crispiness.
Oven method is best: 400F for 10 to 12 minutes on a wire rack, uncovered. The rack allows air circulation on all sides and restores crunch to the coating. This works better than any other reheating method for maintaining the texture.
Air fryer at 375F for four to five minutes is even better if you have one. The circulating heat re-crisps the coating in a way that the oven cannot quite match.
Avoid the microwave for chicken parmesan. The steam generated inside the microwave goes directly into the coating and the result is a soft, pale crust with no texture. If you have to use it, at least finish with two minutes in a hot pan to re-crisp the exterior.
Freezing works well before or after baking. Freeze breaded uncooked cutlets individually on a sheet pan, then transfer to a bag. Cook from frozen at 425F for 25 to 28 minutes. For cooked chicken parmesan, freeze in portions without extra sauce on top and reheat in the oven at 375F for 18 to 20 minutes from frozen.
Chicken Parmesan
Ingredients
Equipment
Method
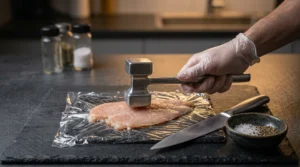
- Prep the cutlets Slice each chicken breast in half horizontally to create two thin cutlets. Place between plastic wrap and pound to an even one-third inch thickness using a meat mallet. Season both sides with salt and pepper. Thin, even cutlets cook through before the coating over-browns.
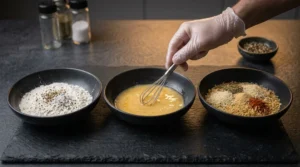
- Set up breading station Set up three shallow bowls: Bowl 1 flour seasoned with a pinch of salt and pepper. Bowl 2 – two beaten eggs with a pinch of salt. Bowl 3 panko, half the Parmesan, garlic powder, Italian seasoning, and smoked paprika, mixed together.
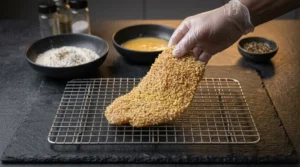
- Bread the cutlets Dredge each cutlet in flour, shaking off excess. Dip in egg, letting excess drip off. Press firmly into the panko mixture on both sides, making sure every surface is coated. Place on a wire rack and let rest for 5 minutes this helps the coating adhere before frying.
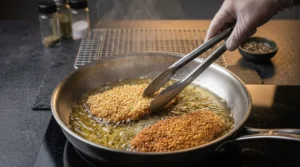
- Fry the chicken parmesan cutlets Heat avocado oil in a large skillet over medium-high heat to 350F. Add two cutlets at a time – do not crowd. Fry for 2 to 3 minutes per side until deep golden brown. Remove to the wire rack. Repeat with remaining cutlets. The coating should be deeply golden and audibly crispy.
- Rest before saucing Let the fried chicken parmesan cutlets rest on the wire rack for 2 full minutes. This is the step that prevents soggy coating. The surface temperature drops enough to slow steam generation when the sauce is added.
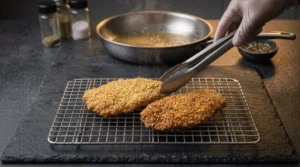
- Add sauce and cheese Spoon two tablespoons of marinara over the center of each cutlet – not the edges. Leave one-quarter inch of coating around the edges exposed. Top with shredded low-moisture mozzarella and remaining Parmesan. The exposed edges stay crispy even after baking.
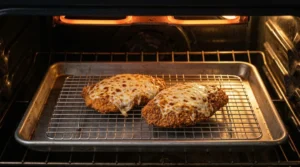
- Broil Transfer the wire rack and sheet pan to the oven. Broil on high for 2 to 3 minutes until the cheese is melted, bubbly, and lightly golden in spots. Watch closely it goes fast under the broiler. Check at 2 minutes.
- Serve Remove from oven and rest for 2 minutes before serving. Garnish with fresh basil leaves. Serve chicken parmesan over spaghetti or linguine with extra warmed marinara alongside.
Notes
- Low moisture mozzarella only: fresh mozzarella releases too much water and makes the coating soggy.
- Rest after frying: 2 minutes on a wire rack before adding sauce this is what keeps the coating crispy.
- Sauce on center only: leave edges of coating exposed. They stay crispy and the contrast is the point.
- Oil temperature: 350F before chicken goes in. Too cool = greasy, too hot = burnt outside raw inside.
- Panko over Italian breadcrumbs: panko is coarser and creates a lighter, crispier coating.
- Rest breaded cutlets 5 minutes before frying: coating adheres better.
- Season every layer: flour, egg, breadcrumbs, and sauce all need their own seasoning.
- Storage: airtight container, fridge up to 3 days.
- Reheat: 400F oven on wire rack for 10 to 12 minutes, or air fryer at 375F for 4 to 5 minutes.
- Freeze: before or after baking, up to 2 months. Reheat from frozen at 375F for 18 to 20 minutes.
NUTRITION
(Per Serving – Estimated)
| Calories | 485 kcal |
| Protein | 42 g |
| Fat | 24 g |
| Saturated Fat | 8 g |
| Carbohydrates | 22 g |
| Fiber | 1 g |
| Sugar | 3 g |
| Sodium | 890 mg |
| Cholesterol | 165 mg |
Calculated using boneless skinless chicken breast, listed breading, avocado oil, marinara, and low-moisture mozzarella. Values are estimates. Pasta not included.
What People Usually Want to Know
Why does my chicken parmesan coating always go soggy?
The two most common reasons are fresh mozzarella (which releases water during baking) and sauce that went on too soon after frying. Let the fried cutlets rest on a wire rack for two minutes before adding sauce, use sauce in a thin layer that does not cover the edges, and switch to low-moisture whole milk mozzarella. Those three changes solve soggy chicken parmesan in most cases. For further reference on safe cooking temperatures for chicken, see the USDA poultry food safety guidelines.
Can I make chicken parmesan ahead of time?
Yes bread the cutlets up to 24 hours ahead and refrigerate uncovered on a wire rack. The exposed air actually dries the coating slightly which helps it fry crisper. Fry and assemble right before serving. You can also fry the cutlets ahead and refrigerate reheat at 400F for eight minutes before adding sauce and cheese.
What is the difference between chicken parmesan and chicken parmigiana?
They are the same dish. Parmigiana is the Italian word the dish originated as Melanzanealla Parmigiana (eggplant parmigiana) in southern Italy and was adapted in the United States with chicken as the protein. Chicken parmesan is the American name and chicken parmigiana is the Italian name. Both refer to breaded protein topped with tomato sauce and melted cheese.
Can I use store-bought marinara sauce?
Yes and a good quality jarred marinara is often better than a rushed homemade version. Rao’s Homemade marinara is widely available at most grocery stores and is the jarred sauce I use most often for chicken parmesan. It has a clean tomato flavor without excessive sweetness or preservative taste.
How do I keep the breading from falling off while frying?
Three things: make sure the flour step is not skipped, let the breaded cutlets rest for five minutes before frying so the coating can adhere, and do not move the cutlets in the oil for the first two minutes of frying. Moving them before the coating has set is the most common cause of breading that falls off in patches.